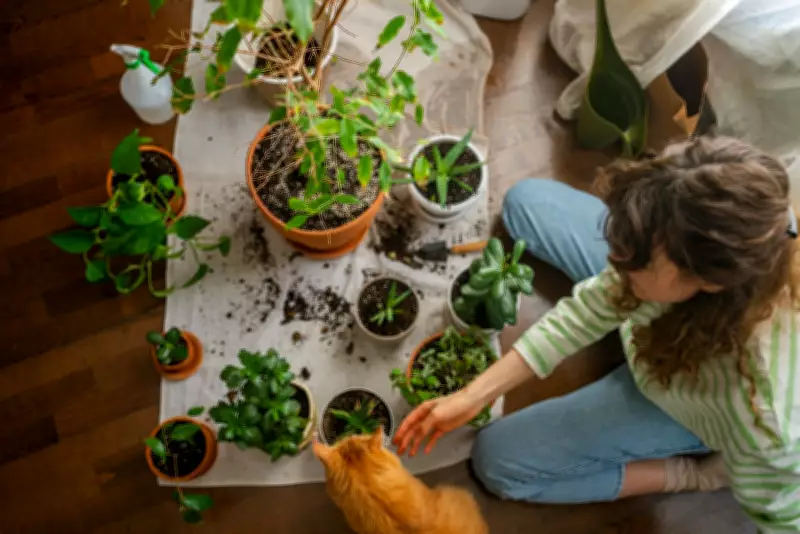
The City Gardener's Guide: Mastering the Art of Repotting Houseplants
For avid indoor gardeners, the moment when a beloved houseplant outgrows its container is both a sign of success and a call to action. Known in British gardening circles as "potting on," repotting is a crucial step to ensure your plants continue to thrive in roomier quarters. This process, while straightforward, requires attention to detail to guarantee a smooth transition for your green companions.
Ideal Timing for Repotting
The period from late February through early summer is considered optimal for repotting houseplants. As daylight hours lengthen and temperatures gradually rise, plants receive natural cues that spring is approaching, prompting them to enter a growth phase. This seasonal shift puts them in the right mindset to adapt quickly to new environments and produce healthy new foliage.
Recognizing When It's Time to Repot
Several clear indicators signal that a houseplant is ready for a larger home. The most obvious sign is roots beginning to protrude from the drainage holes at the bottom of the pot. In more severe cases, roots may even become visible on the soil's surface. Other telltale signs include a plant that appears top-heavy and tips over easily, or one that dries out more rapidly than usual despite consistent watering.

Preparing for the Repotting Process
To ensure a successful repotting, start by watering the plant thoroughly the day before the procedure. This helps keep the soil intact during removal and provides the plant with a boost of hydration ahead of the transition. Never use regular garden soil for indoor plants, as it can compact and hinder drainage. Instead, opt for a high-quality potting mix specifically formulated for your plant type, whether it's a tropical variety, orchid, or cactus.
Many gardeners find standard potting mixes too dense and prefer to lighten them by incorporating additives like perlite or vermiculite at a rough ratio of one part additive to four parts soil. Alternatives such as coarse sand, crushed bark, or fine gravel can also improve drainage and aeration, creating an ideal growing medium.
Selecting the Right Pot and Soil Setup
When choosing a new pot, aim for one that is only about an inch or two larger in diameter than the current container, unless dealing with a large floor plant. Oversized pots can lead to waterlogged soil, which may cause root rot and other fatal issues. Begin by placing a layer of small pebbles or gravel at the bottom of the new pot to facilitate drainage, especially if the pot lacks drainage holes.
Add a layer of your prepared soil mix on top of the gravel, enough so that when the plant is placed inside, its surface sits about one inch below the rim. Gently tamp down this base layer with your fingers to create a stable foundation.
Executing the Repotting Step by Step
Carefully remove the plant from its old pot by tilting it sideways and tapping or squeezing the container to loosen the root ball. If it resists, gently run a knife around the inner edge to free it. Once extracted, inspect the root system for any dead, rotting, or mushy roots, trimming them away as needed. Also, loosen any roots that are circling tightly around the root ball to encourage outward growth.
Center the plant in the new pot and check the depth, adjusting the soil base if necessary to maintain the one-inch clearance. Fill in the gaps around the sides with additional soil mix, firming it gently with your fingers, a chopstick, or a wooden ruler. Lightly tapping the pot on a surface can help settle the soil as you work. After planting, water thoroughly to eliminate air pockets, adding more soil if depressions form.
Post-Repotting Care and Recovery
Place the newly repotted plant in a location free from drafts and direct sunlight for a few days to minimize stress. Water only when the soil begins to dry out, and refrain from fertilizing for at least one to two months, as the fresh soil provides ample nutrients. It's normal for the plant to appear droopy or unhappy for a day or two post-repotting. With proper care, it should recover swiftly, often producing new leaves within a couple of weeks as it settles into its expanded home.

By following these guidelines, indoor gardeners can confidently navigate the repotting process, ensuring their houseplants continue to flourish and bring vibrant life to their living spaces.